Drywall ceilings are a common feature in many homes and buildings, providing a clean, smooth surface that can easily be painted or textured. However, over time, drywall ceilings can become damaged, whether it's due to water leaks, settling foundations, or other factors. When your drywall ceiling is in need of repair, it's important to have the right tools and techniques to ensure a professional-looking finish. In this ultimate guide, we will explore the best drywall ceiling repair techniques to help you restore your ceiling to its original condition.
One of the most common issues with drywall ceilings is cracks. Cracks can occur due to the natural settling of a building, changes in temperature and humidity, or even simple wear and tear over time. For drywall ceiling repair, start by cleaning out the crack with a utility knife to remove any loose debris. Next, apply a thin layer of joint compound over the crack using a putty knife, making sure to smooth it out as much as possible. Once the joint compound is dry, sand it down until it is smooth and flush with the surrounding ceiling. Finally, paint over the repaired area to match the rest of the ceiling for a seamless finish.
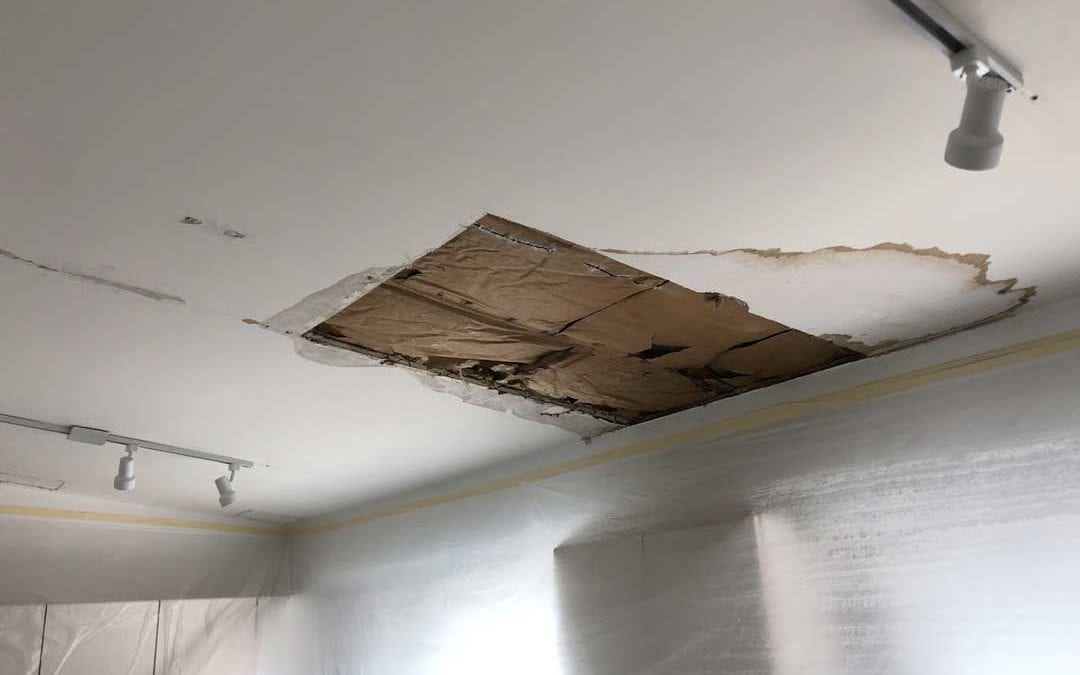
If your drywall ceiling has water damage, it's important to address the issue as soon as possible to prevent further damage and mold growth. To repair water-damaged drywall, start by cutting out the damaged section of drywall using a utility knife. Make sure to cut out a clean square or rectangular shape around the damaged area to ensure a proper fit for the replacement piece. Once the damaged drywall is removed, cut a new piece of drywall to fit the hole and secure it in place with drywall screws. Next, apply joint compound and tape over the seams to blend the new piece of drywall with the existing ceiling. Sand the area smooth and paint over it to match the rest of the ceiling.
If your drywall ceiling has sagging or drooping areas, it may be due to a lack of proper support or insufficient fasteners. To repair sagging drywall, start by removing any loose or damaged drywall from the ceiling. Next, use drywall screws to secure the existing drywall to the ceiling joists, making sure to add additional screws for extra support. If the sagging area is large, you may need to install additional support using a piece of plywood or furring strips. Once the drywall is securely in place, tape and mud the seams as needed, sand the area smooth, and paint over it to blend with the rest of the ceiling.
If your drywall ceiling has texture that has been damaged or removed, you can easily repair it using a few simple techniques. To repair textured drywall, start by cleaning the area and removing any loose texture with a putty knife. Next, apply a thin layer of joint compound to the area using a texture brush or roller, making sure to match the existing texture as closely as possible. You can create various textures, such as knockdown, popcorn, or swirl, depending on your preferences. Once the texture has dried, paint over it to match the rest of the ceiling for a cohesive look.
In conclusion, repairing a drywall ceiling may seem like a daunting task, but with the right tools and techniques, you can achieve professional results. Whether you're dealing with cracks, water damage, sagging areas, or texture issues, following these repair techniques will help you restore your drywall ceiling to its original condition. Remember to take your time, follow each step carefully, and don't hesitate to seek professional help if needed. With a little patience and effort, you can have your drywall ceiling looking as good as new in no time.